
You don’t always have to spend a lot of cash for iPad apps and accessories. While it is already common knowledge among tablet users that hundreds of apps can be downloaded for free or very cheaply, most iPad accessories, especially those under the license of Apple itself, are quite pricey. But then, did you know that you can make an iPad accessory such as the stylus for only a few cents?
Making accessories yourself can help you save a lot of cash for iPad upgrades. With everything getting very expensive these days, doing things yourself to save money benefits you in the end. Here are the steps to follow if you want to try your hand at making your own stylus.
First, you will need to collect following materials: a wedge of the yellow part of a Scotch Brite dishwashing sponge, the plastic casing of a ballpoint pen (the ink is taken out), and around six inches of wire.
You will need to drill a hole around two inches from the tip of the pen using a small drill bit. If you don’t have a drill, you can put one tip of the wire over a flame and when it is very hot, press that tip on the pen where you want the hole to be. The wire will poke a hole through the pen so it can go through it.
Wrap one end of the wire around half of the sponge. Then, thread this into the pen, with the other end of the wire going into the hole and out of the pen. The sponge should fit snugly in the writing tip of the pen. Wrap the part of the wire that went out of the pen several times around the body of the pen.
Finally, trim the sponge so that the tip is approximately the size of the tip of a stylus. Now, your homemade and cheap stylus is ready to use. Take note though that your thumb or fingers should be grasping or touching the exposed part of the wire for the stylus to work. This cheap stylus can be used not just on the iPad but on other touch screen tablets too.
Another iPad accessory you can make by yourself and should not cost you a lot would be an iPad stand. There are times when you just want to put your iPad down because your hands are too tired from holding it. But then, you want it to stay at an angle so you can still read what is on the screen.
All you need is a metal bookend and six half circle rubber feet. Two of the rubber feet should be placed on the upper ends of the bookend, so that the iPad won’t get scratched when it is placed on it. A pair should be placed ¾ inches away from the back on the bottom top of the bookend, and the last pair an inch and a half from the back. The first pair will give you a near level view of your iPad and the second pair will give you a more angled view.
With this knowledge, you will never have to pay so much cash for iPad styluses and stands!






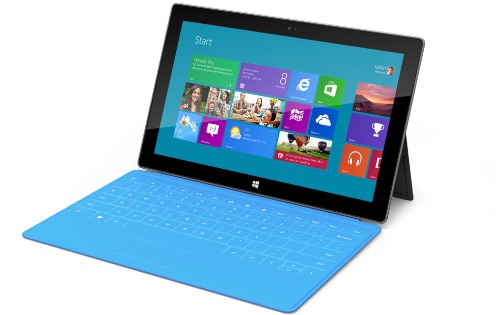 The more advanced version is called the Surface Pro. It is thicker at 13.5mm and a bit heavier at 1.9 pounds. However, the pro version will use Intel’s more powerful 22nm Ivy Bridge processors and run Windows 8. It also has a higher option for internal storage at 64GB and 128GB. This higher version will also have a 10.6-inch ClearType “Full HD” display.


 techieheart
